Thrifting

It’s been one of those weeks.

Nothing major. Just the kind of week that sometimes bubbles up when you have a big, full life and a happy, active family. We’ve experienced a lot of transition in a short amount of time. In addition to our move, I started my new job, which means I’ll travel more but am also home more. We’re all trying to figure out the rhythm of life – and draw some physical and virtual boundaries – when Mom offices at home. The kids transitioned to their new school/preschool classrooms, which has been awesome.  But with a new school year and new mixes of classmates, a few social issues have come up for them which has required a little extra parenting. On top of that, this week handed us a nice trifecta of weird-but-gross kid stuff – a skin infection, head lice, and strep throat. Charlie celebrated a birthday, which meant treats & planning for 3 different occasions – including his very first slumber party. And Joe was out of town for a conference, which meant I was on my own for most of this fun.

Small things in the scheme of things. Wonderful things in the scheme of things. But I’m not gonna lie…by Friday night, I was exhausted.

And yesterday, I was more than ready for a little solitude and was craving a creative outlet, so I decided to head to the Kansas City West Bottoms all by myself for some vintage treasure hunting.

(For those of you who aren’t from the KC area – the West Bottoms is a historic district in the river bottoms. The first weekend of each month, stores open up with all sorts of art and vintage/antique/repurposed treasures. It’s worth checking out, but I digress…)

In addition to sort of selfishly just wanting a day to be alone and think and create, I also had some clear objectives. I know I’ve mentioned before that I read The Life-Changing Magic of Tidying Up this summer. I sort of went all KonMari* when we moved – we sold or donated a LOT of stuff. So less stuff + bigger house = all sorts of empty spaces that I’ve been contemplating. And as of Friday, we still hadn’t hung a single thing on the walls (tht has since changed) and the empty-ness and the high ceilings was getting to me. It was feeling a little less like “home” and a little more like a gymnasium.

Plus, stuff in the West Bottoms is old, so it’s cheap. And cheap is good when you’re raising 3 little boys and trying to renovate a home on a budget.

So I was on a mission. Maybe it was just good luck.  Maybe it was because I knew exactly what I was looking for. Or maybe the Universe just knew I was in desperate need of a win.  But I can say with confidence – Mission Accomplished!

Here are a few of my favorite finds (as always, you can click on a pic to enlarge)…

The first thing I stumbled upon was this great mid-century chair at Hello Sailor. I’d been looking for a small-ish chair to put on my side of the bed in place of a bedside table. I’d been looking at some similar style chairs online, but couldn’t find one that was quite right. The upholstery on this one coordinates with our wall color, and the wood tone matches our bedroom set almost perfectly. And it’s a legit Goldlocke chair, with a seal and all.

Lest you think I’m some sort of savvy vintage shopper, I didn’t know this chair was a “Goldlocke” until after I bought it and the saleswoman pointed it out to me..then I had to Google it.

Next, also at Hello Sailor, I found this pair of high-back velvet tufted Broyhill chairs. I wasn’t 100% sure I wanted them and was sort of hemming and hawing about them. Until I asked the vendor how much she wanted for them and she told me $40 FOR THE PAIR. Sold!

img_8923Who is this dirty-faced child and where is his mother?

I’m thinking these will “live” in the entry. Joe and I have had quite the debate about our old piano (that’s a post for another day), but ultimately I think he’s going to win and the piano will find a home in our entry, across from the bar, with these chairs on each side.

Sort of a 1920s piano bar vibe…can you picture it?

Next up…I think I found my home decor spirit animal at Bella Patina.  I’ve been following Nova Engle (@green.nova) on Instagram for awhile, and finally got a chance to shop her booth this weekend. I snagged a couple of cool basket vases filled with greenery.

img_8950img_8963

But even better, I purchased some Nova Engle’s original art  – a pair of abstract green & black canvases.  Those found a home on the curved wall in the dining room along with another West Bottoms find – a vintage green leather chair from Top Hat Mercantile.

img_8966

I also grabbed a couple of smaller accessories. Keeping with my obsessed-with-green theme, I found a fun (and super-cheap) piece of pottery at Top Hat Mercantile (right next to the green chair).  For now, it has a home on the dining room buffet, underneath the gallery wall we created with framed wallpaper scraps from the house before demo.

img_8957

img_8952

And last but not least…a $9 bowl of wooden fruit. I have no idea where I’m going to put it, but for now it’s on the side table in the living room, next to the sectional.

img_8944There’s that little boy again. His Mom finally cleaned him up.

img_8958I have no idea why I love it, but I love it.


And now our house feels just a bit more like our home.


*In short, the KonMari method involves holding each of your belongings -literally holding it…or hugging it – and deciding whether to keep it or not based on how it makes you feel.  If it “sparks joy” you keep it. If not, you get rid of it.  Joe has teased me quite a bit about this, and I will admit I did not literally hold or hug everything  I own, but the general principal is a pretty good one. Surround yourself with things you love. And I will admit that I feel much more clear-headed without all that “stuff” everywhere…and my house is a lot easier to clean, too!


Unpacked

As moving week/weekend winds down, I’m kind of feeling all the feels. 

We still have a long way to go…but it feels pretty surreal to be (almost) unpacked and finally living in the space we dreamed about for over 2 years. 

My body is tired, but my heart is filled with gratitude for the friends and family who watched the boys during moving week, all the folks who have already brought food & wine & friendship to our new space, and – most of all – for my husband who has an uncanny knack for seeing hope and possibility everywhere…even an abandoned old house in the middle of northwest Missouri. 

Cheers to new beginnings, friends!

Floors, Part 2

Upstairs hardwood floors during sanding. 

I’ve said many times before, the woodwork was one of the main things that sold me on this house. But by “woodwork” I mean the trim – baseboards, door casings & headers… Truth is, I was never too sure about the floors. We knew we had hardwood everywhere, but with the house abandoned for almost 10 years they were so dirty (and some covered up with carpet) that it was hard to see what was there.

As with everything, though, we wanted to save what we could and we really thought we’d be able to save all the wood floors. Sadly, the downstairs wood couldn’t be saved (you can read Floors, part 1 for more on that). But, luckily, the upstairs floors were salvageable.

One big surprise about the house was what good condition the upstairs floors were in. It’s really astonishing given the stories we’ve heard (and evidence we found) about the roof leaking for years (decades?), to the point that the ceiling was almost totally rotted out and you could see daylight through the ceiling & roof.

IMG_9358
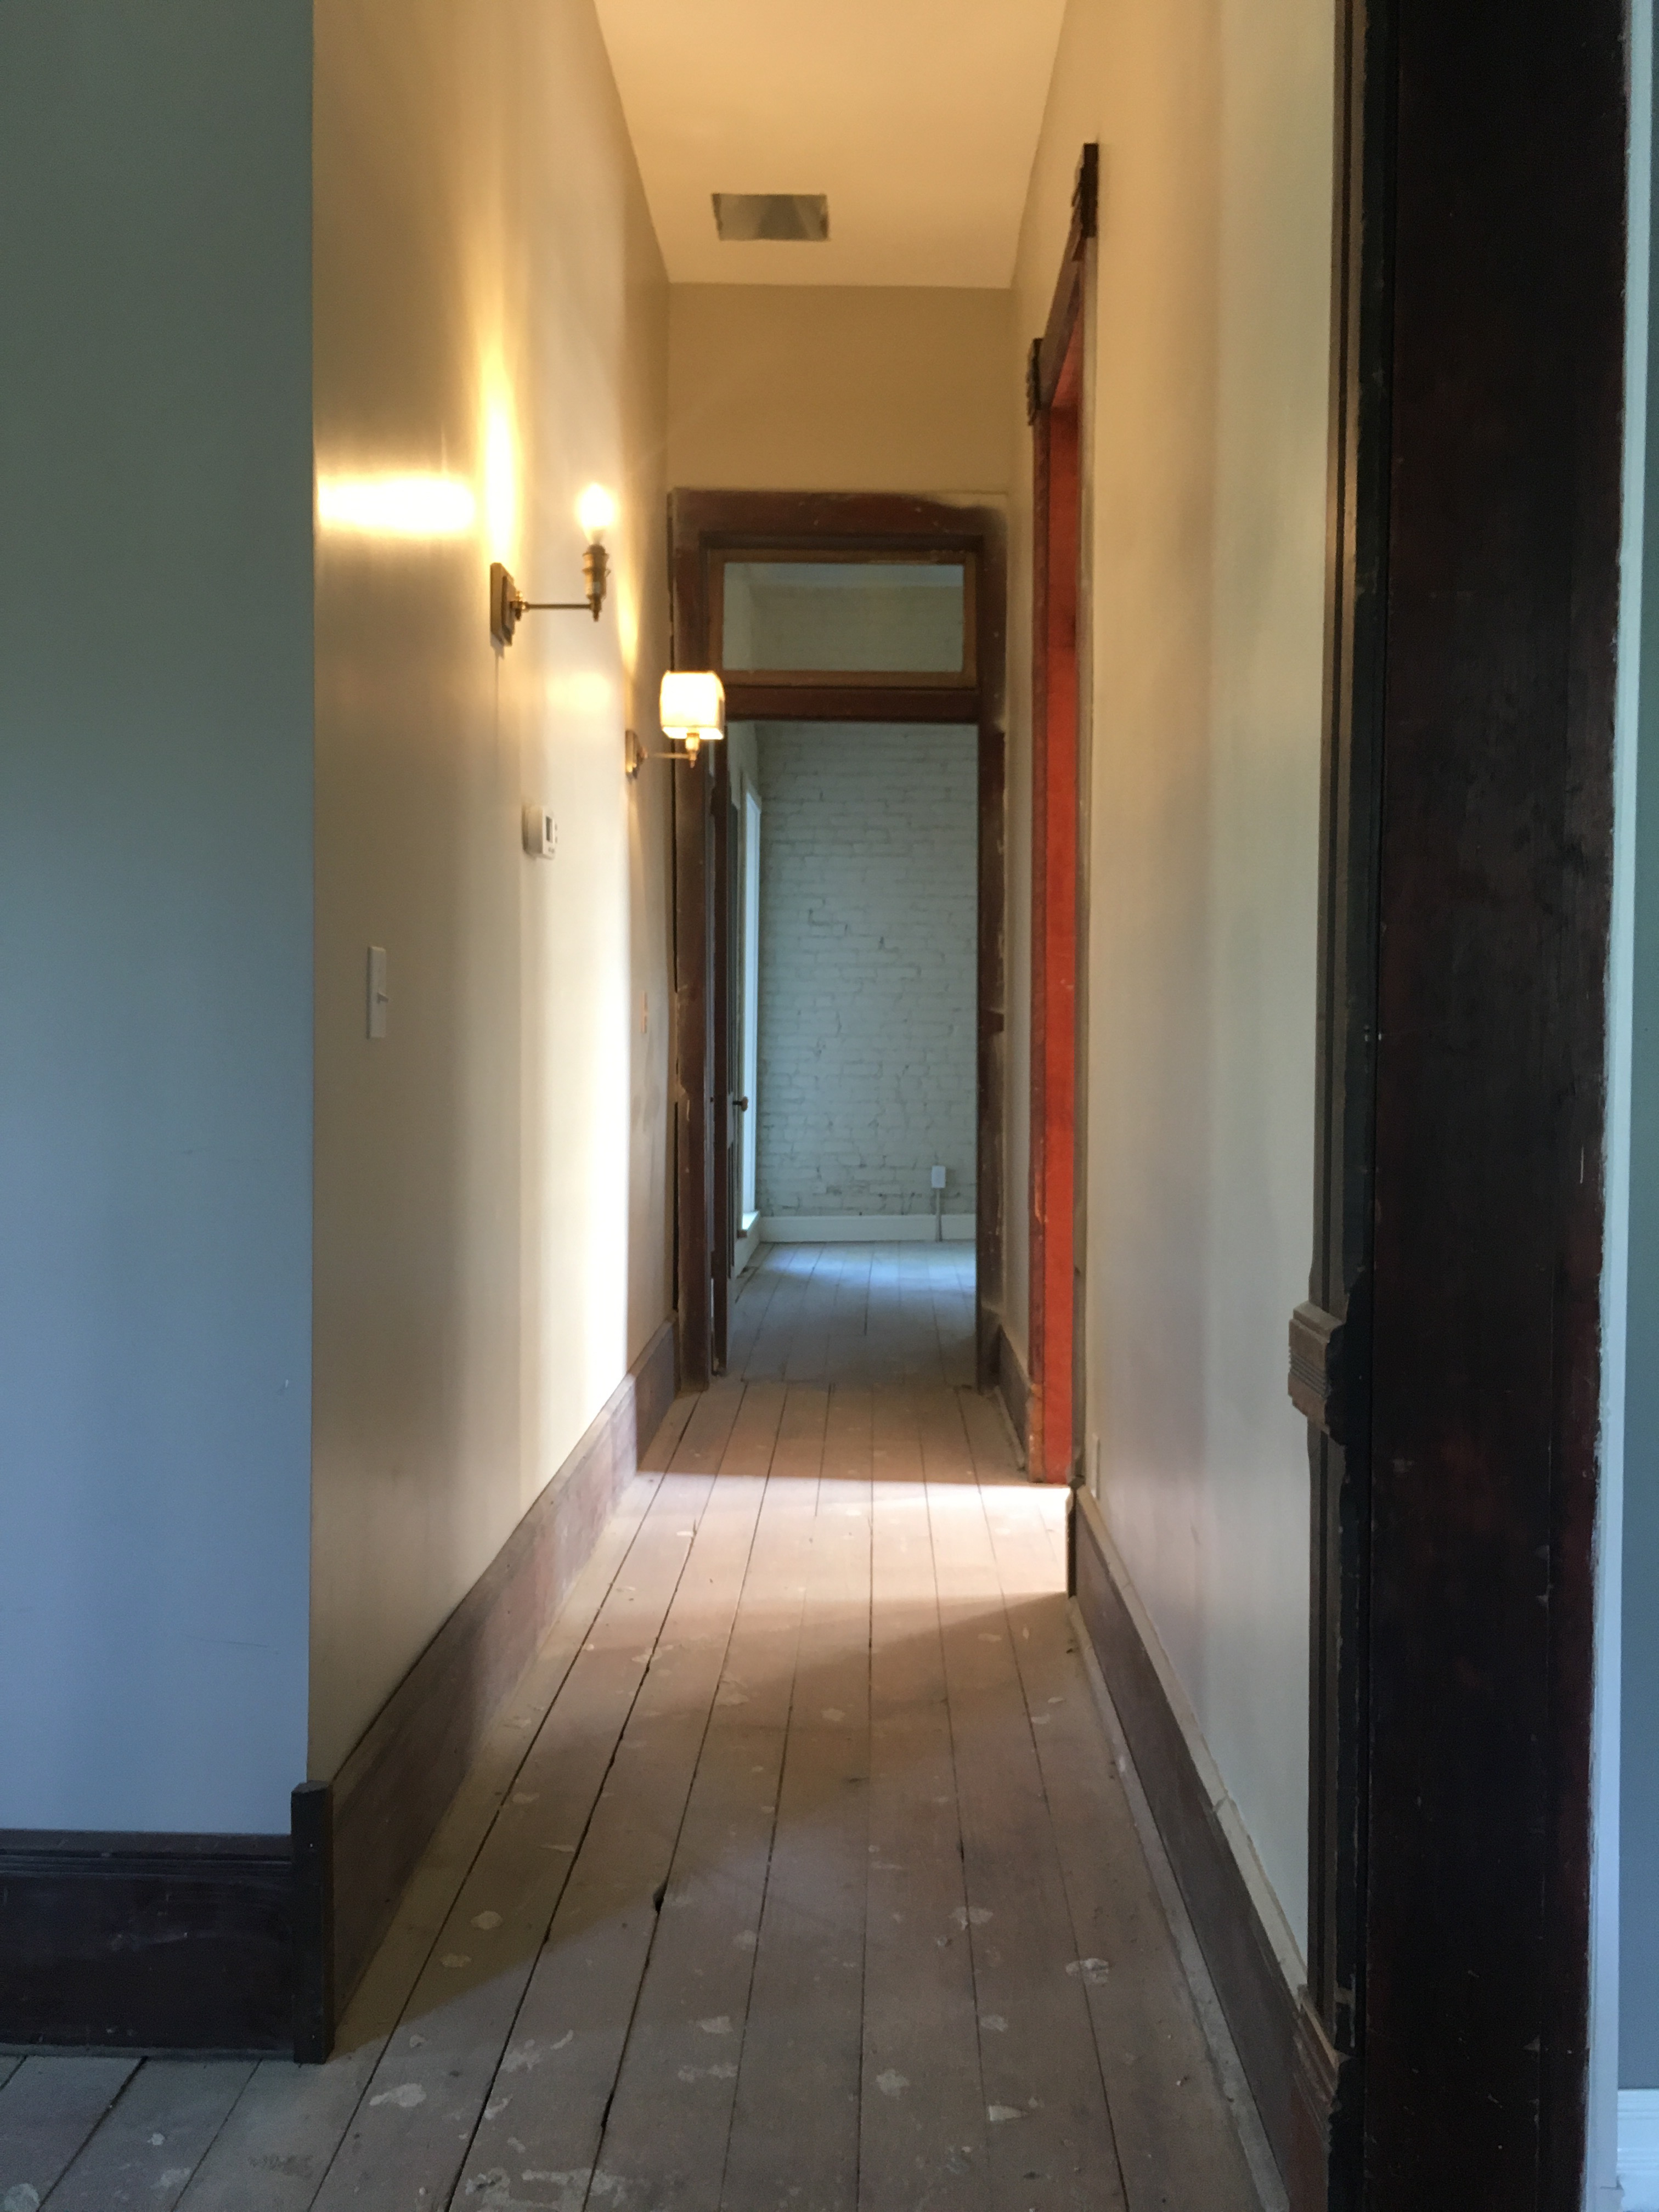
These were the ceilings in the upstairs landing when we bought the house. Just a little reminder of how much water had come in…we also had a nice family of raccoons living up there, too.

Somehow, these old pine floors survived all that and, just last week, All Star Hardwood Flooring worked some serious magic and brought them back to life.

Here are a few “before” pics I took, the day before they came. The floors were about as clean as they’d been since we bought the house. So this was truly a best-case “before” photo shoot.

And now, the “after” shots. Because pine can get splotchy when stained, we went with a natural finish which meant we didn’t get to pick a color. The finish just brought out the natural tones and variation in the wood. So it is a little more amber in some places, more yellow in others, and more brown in some spots.

Honestly, it doesn’t look anything like I thought it would. And I love it even more than I thought I would.

As I write this, they are sanding the downstairs hardwoods which are new oak floors and will be stained a medium-dark brown. I’m convinced they’ll be showstoppers, too, but won’t have nearly the personality of the upstairs floors.

Downstairs floors are set to be done early next week. Then, as far as interior stuff goes, we’ll be down to finish trim, a final punch list, and a top-to-bottom cleaning.

We scheduled movers, but I’m not going to share the date yet for fear of jinxing it.

I’m not superstitious, but not taking any chances.

Onward.

Bringing the house back to life…one baseboard at a time

One of the things that made me fall in love with this house – and ultimately go along with Joe’s hair-brained scheme to buy it – was the woodwork. It is beautiful, mostly unpainted, and full of character. Much of it is unlike anything I’ve ever seen. When we bought the house, we knew we wanted to save as much of it as possible (chips and all).  We also knew it would take a special kind of trim carpenter to “get” our vision for the project, and have the skill to bring the old woodwork back to life while creating new pieces that look like they could have been there all along. We found that in Keith, a retired wood shop teacher from a neighboring small town.

After Keith basically worked magic when he refinished our doors, we knew he was the one we wanted to do the rest of the woodwork and trim. Although he doesn’t fancy himself a “trim carpenter” per se, he agreed to become ours (with a little coaxing).

Once the walls went back up at the house, I was extremely excited. But I was also a little anxious that in gutting the house, we had also gutted the character. As much as I love some of our new finishes, I didn’t want a new house (as I’ve said at least a thousand times, if I wanted a new house I would have built one…and it would have been faster and cheaper). But once Keith started putting the old trim back up – and even creating new pieces – that anxiety went away. We have been so lucky to find so many talented folks to help us with this house, but Keith is the one who brought it back to life.

First the old stuff.  This all got pulled off the wall during demo. Keith has cleaned it back up and pieced it back together and figured out how to fill in strange gaps and weird angles. It’s almost 140 years old, and it is chippy and full of character and I just love it all. As usual, you can just click on any pic below to view it larger.


And the new stuff. Most of the bedrooms either had no trim (or rotted, totally not-full-of-character boards nailed to the wall). There was a piece that needed to be replaced in the dining room and a bar cabinet that needed to be trimmed out and stained to look as built-in as possible. And, of course, we added two bathrooms and a large opening to the kitchen. So there was lots of trim that needed to be created. Two of the most “WOW” moments for me were:

  1. When I saw the trim Keith created for the large opening between the dining rom and kitchen. That was totally his idea, and I think it looks like it could have been here 134 years ago.
  2. When I saw how he trimmed out the bay window in our bedroom. It is simple white trim and may not look like a “WOW” moment to you, but that window was an ugly MESS when he started…and he made it beautiful.

So, in addition to being a heck of a nice guy and extremely skilled, I’m now convinced Keith is an artist.

Cheers to you, Keith.

img_6656

Off Center Anniversary

Exactly one year ago today, Joe and I signed the papers to buy a very old (and VERY abandoned) house on a tiny piece of earth in the middle of the USA.

We might have been a little bit crazy…but we’re not afraid to bite off way more than we can chew.

It’s probably not the most financially sound decision we’ve ever made…but it’s one of the most fun.

To be sure, there have been highs and lows, stress and excitement, weeks of monotony and several unexpected surprises… But I can honestly say I haven’t spent even a second of the last year feeling sorry that we took on this project. And I’m happy to say that we are getting pretty close to the finish line (at least on the inside).

In honor of our very first Off Center Anniversary, I dragged the fam over to the house today to recreate some of the photos that we took during those very first days after it became ours. I created a little “before & after” mosaic below, with all the “before” images in the left column and the “one year later” images in the right column.

As always, you can always click on a photo to open the full image and to to see it larger & in more detail.

Paint preview 

The sun is finally shining at the Off Center Revival!


Almost two weeks of rain slowed down the drywall process a bit (the mud was SLOOOOOW to dry) but, overall, things are moving along.

With walls finished, the interior painting has begun…

And let me tell you, this house is taking a LOT of paint.

Sherwin Williams has basically been my second home lately. I’m not sure if they’re sick of me or just happy to see dollar signs when I walk in the door (I lost count of paint & primer purchases at about the 50 gallon mark…).

So far, they’ve sprayed all the primer and have painted all the ceilings and most of the brick that will be painted. Today, they starting spraying/rolling the walls. Here’s a little sneak peak of where things were this afternoon.

Living room and dining rooms ceilings and walls are the same color – a light gray/greige. Although you can’t see it here, I really like the way it looks against the wood trim.

Dining room looking into the kitchen. Paint is still wet so looks a little streaky.

The kitchen walls are a creamy white. I sort of love the rustic-y vibe of the brick with just two coats, so I think we’ll keep it like this. Is rustic-y a word?

Downstairs bathroom, which is notoriously difficult to photograph. Here you can see the exposed brick against the smoky gray walls and ceiling, Once we have the marble-look tile on the wall and brass fixtures, this tiny bathroom may end up being my favorite room.

The boys’ bathroom with more rustic-y painted brick. The shower enclosure will be trimmed out with white subway tile.

Master bedroom. The ceiling is a sandy linen color, the brick will remain exposed, and this wall will be a dark slate blue-gray.

I don’t want to jinx us, but things should really start moving along in the next few weeks. Painters should be done (or nearly done) by Monday. The trim carpenter has started his work, and early next week the cabinets will be set, light fixtures installed, and dining room floor laid. And we have another crew working on the outside, painting the garage and fixing some gutter issues. Front porch and trim work should begin in the next week or two.

Stay tuned!

Panoramas

As I mentioned in my previous post, over the last week or so I’ve been getting some panoramic shots of our naked, pre-sheetrock rooms. We’re still on track for sheetrock to start on Monday. And, despite a bit of a fear of jinxing myself, I have decided present to you our last set of “before” pics…because once we have walls, everything else goes in the “after” category. Right?

So here’s a little tour through the house as it is this week, with a little preview of our design vision for each room. I should mention that choosing colors and finishes had me completely paralyzed, so I want to give a huge shout out to our designer, Erin McKenna. Four short meetings with her (3 at the house, 1 at the tile showroom) got me completely un-paralyzed and focused. She did an incredible job of helping us select design elements that matched our style and our budget. 

Remember – panoramic view totally screws up proportions…so rooms may be larger or smaller than they appear…

The important one(s): the master bedroom and bathroom

Standing on the west wall, looking toward the east bay window. This big, old mantle is just sitting in the middle of the room right now. It isn’t original to the house and I’m not sure where it came from. But it will have to go…

Standing in the east bay window, looking toward the (new) west wall. The door on the right leads to the master bathroom, which is about 6 x 12. The door on the left leads to our walk-in closet, which is about 6×8. There is a south-facing window to the left, which we would love to eventually replace with a door and a small balcony. To the right is the doorway leading to the upstairs landing.

Exposed brick on the east wall of the master bedroom. The bottom color will be on the adjacent sheetrock walls.

The master bedroom walls will be a combination of exposed brick and sheetrock painted Whale Gray (the bottom, darkest color on this paint chip in the pic above). We’ve already purchased our bedding – it is the stonewashed belgian linen duvet from RH in dune (in the center of the design board below). The head of the bed will be in the bay window, with a small brushed brass swing-arm sconce mounted on either side of the bed.

Design elements for master bedroom & bathroom

In the master bath (which I couldn’t really get a good picture of – it’s about 6 x 12, so long and skinny), the walls will also be gray. But we are planning to go with a light gray, probably a shade or two lighter on the chip than the Whale Gray. We’ll have a 72-inch double vanity, painted white dove with two mirrored medicine cabinets (one above each sink) and 3 tube sconces (one on either side of the mirrors and one in between them). I prefer brushed bronze fixtures in here, but Joe wins this one with his preference for chrome. The floor will be 12 x 24 marble tiles in “candid heather” (the left-most rectangular tile above). The shower floor will be a mix of the 3 marble hex tiles in the pic above – they are all the same color but have different finishes (polished, scraped, and sandblasted).  The shower walls will be a large 4 x 10 white beveled subway tile.

The work zone: the upstairs landing

Standing in the doorway of the master bedroom, looking north. This will primarily serve as an office/work space for me and Joe and the boys (in that order). 

Light fixture and paint color for the upstairs landing.

The plaster walls will be painted Revere Pewter and the brick wall will remain exposed. We have a really fun, funky light fixture picked out here. I think we’ll probably use an industrial-style table or two to serve as desks, with probably at least one adjustable or counter-height table as a standing desk. I might even get crazy and do a treadmill desk. We’ll also have our bookshelf and probably some comfy chairs, chaises, or beanbags. This space is really kind of huge and has great natural light. It’s honestly one of my favorite spaces in the house, but also one that may sort of come together after we live there a bit.

The one that can’t show dirt: the boys’ bathroom

Standing in the boys’ bathroom doorway, looking in.

Immediately to the right will be a wall-mount vanity with a double-trough sink (we went with this IKEA model), with the toilet on the other side (next to the brick wall). The large closet-like space is going to be the laundry closet with bifold doors. On the left edge of this pic is the stand-up shower.

Design elements for the boys’ room. Note the black on gray on gray on gray color scheme… Our designer had one directive on this room – it needs to hide dirt at ALL costs.

The boys’ bathroom floor will be these white and black patterned hex tiles with dark gray grout. The brick wall will be painted White Dove (to give it a subway-tile look) and the rest will be Galveston Gray. The tube sconce will be mounted horizontally over the mirror.

The least of our concerns: the boys’ bedrooms

Standing in the doorway of Max’s room, looking in.

We’ll leave the brick wall exposed in Max’s room and paint the others “Clay Beige.” Max will have a simple ceiling fan light and wants to do his room in a sports/baseball/Royals theme (shocking!). We’ll need to get new bedroom furniture for him, and we’ll probably do a bit loft bed from IKEA, with a desk underneath. The doorway on the left edge of the picture leads to a large shared closet, which connects to his brothers’ room. This will either be a really cool secret passage or an annoying way for his little brothers to spy on him…or both!

The little boys’ room, standing in the doorway facing south.

Some of the brick is really rough here, so it will likely be mostly painted (Clay Beige, like in Max’s room). They only have two sheetrock walls – one pretty big and one pretty small. The small one will probably be painted with chalkboard paint. They want a Star Wars room and are obsessed with a fathead they saw of Han Solo in carbonite and this Wampa Rug. So we’ll probably buy those and call it a day.  Whatever.

Downstairs bedroom/playroom, facing the northwest corner. 

Downstairs bedroom/playroom, facing the southwest corner. 

The downstairs bedroom will be a playroom for now…but we are imagining this as a little more grown-up space than our boys’ current playroom. We will mount a TV to the wall and have their movies and gaming system in there, and will also store board games and legos in this space. The “little boy” toys will probably be stored in the little boys’ room. We hope this becomes a space where everyone can kind of hang out and have fun. This room will probably be Revere Pewter or Clay Beige…

The boys’ bedroom & playroom design elements basically consist of a paint color for the wall (Clay Beige), and one for the trim (White Dove).

The big one: the living/dining/entry

Standing in the living room bay window, looking west through the living room and dining room, into the kitchen.

Living room, facing south.

Design elements for the living/dining/entry

The brick wall will stay exposed, and the rest will be painted Revere Pewter. The original mustard-brown tiles will stay on the mantle, and there are also some original large marble tiles that lay in front of it. We’ll put a large mirror over the fireplace and the TV to the right. We haven’t purchased living room furniture yet, but I’m eyeing a light brown leather sectional, emerald green chair, and brown & white cowhide rug. We’re also planning to have an industrial-style table on the north wall to serve as a little desk/work area, with the big 1950s map we found in the house hanging over it.
Living room, facing the northeast corner of the living room. We’ll put some sort of little seating in the bay window…but not sure what yet.

Dining room. 

All the dining room walls with be sheetrock or plaster, and all will be painted Revere Pewter. Our dining table will be fully extended (to seat 8-10) and situated toward the bay window half of the room, leaving the doorway into the kitchen mostly open. We have two large crystal chandeliers to hang over the dining table. We’ll get some kind of big sideboard to go along the west wall…I’d love to find something vintage or restored. I plan to display the old wallpaper remnants from the house in brass frames over the sideboard. On the curved walls (on the right), we want to find a cool piece of art (we have a directional can light there) and maybe a fun chair…

Front entry.

The entry will also be Revere Pewter. We have a large French-style chandelier to hang and there will be a built-in bar under the stairs (cabinetry to match the stairs with a quartz countertop in Frosted Wind, that looks like marble).

The really, really tricky one: the kitchen

Standing in the dining room door, facing west.

The kitchen is the room that keeps me up at night. This one has been a challenge.  It’s not very big (about 12 x 12) and has so many weird windows and doors that it is hard to configure. Plus, the back door will be a primary entrance for the family and this will be a main thoroughfare through the house. We’ve settled on an L-shape design (counters along the west and south walls) with upper cabinets on the south wall and no uppers on the west wall.  There will be a wall of pantry cabinets on the north wall, between the mudroom and bathroom doors. We are planning on a small island, but it’s going to be tight so not sure if we’ll have an overhang for bar stools or if it will be more of a prep & perch area (rather than a seating area).

Kitchen design elements

We are going with large charcoal gray tiles on the kitchen floor – they aren’t slate, but have a very slate-like look.  The cabinets will be painted Coventry Gray and the walls will be painted White Dove. We’ll have a white apron-front farmhouse sink and brushed bronze fixtures (our faucet is from Delta). Our countertops will be quartz with a marble look. I really love our island light, the Bistro Globe chandelier – it’s probably my second-favorite light…after the explosion chandelier upstairs.

The small but fierce one: the downstairs bath

Downstairs bath. Standing in the doorway looking in.

The downstairs bath is 5 x 8, so just *barely* big enough to be a full bath. The tub/shower is to the far left in this picture. The room had a large window that started at the floor, so we had to frame that in and glass block it for the shower. There will be a pedestal sink on the right with an oval mirror hanging over it, and the toilet in the middle.

Design elements for the downstairs bath. This room is tiny, but it is probably the one for which I have the clearest vision for the final design.

The downstairs bathroom floor will be the same slate-like floor as is in the kitchen. We’re also going with brushed bronze fixtures in this room with a single sconce hanging next to the mirror, marble-look tile on the shower wall, and Delta Cassidy shower fixtures.

So there you have it…one last “before” tour of the house and the design vision for each room.

We’ll regroup in a few months and see what came true.

Inspection-ready

I know, I know…it’s been a few weeks since I posted. But I’ve spent the better part of February traveling (some work, some play), so I just haven’t had time to post an update.

This is us…just one week ago…somewhere in Mexico. *Sigh*

But fear not, while I was showing off my spray tan on a Mexican beach, things were moving along at the Off Center Revival. I’m happy to report…

[drumroll please]

…that we are INSPECTION READY!

What that means is that all the “systems” (HVAC, electric, plumbing) are installed and ready for the city to come in to give us approval (or not) to keep moving forward.

I never thought I’d be so happy to see an electrical panel!


Wires, pipes, conduit, and ductwork…all running happily through the basement!

The electrician is all finished. And, because of the age of the house and the mix of plaster, brick, and sheet rock; some of the electrical will actually become cool, industrial design elements.


Downstairs bathroom. It’s a little tough to photograph because it is somewhat small (approximately 5 x 8). But you can see the edge of the tub at the bottom left, with the glass block window (recently done) over it. This will be tiled in as a tub/shower. The toilet will be in the center of the pic. Just out of frame, to the right, will be a pedestal sink. The electrical box you see here will be a wall sconce next to the bathroom mirror (over the pedestal sink). The brick will remain exposed here.

FullSizeRender.jpg
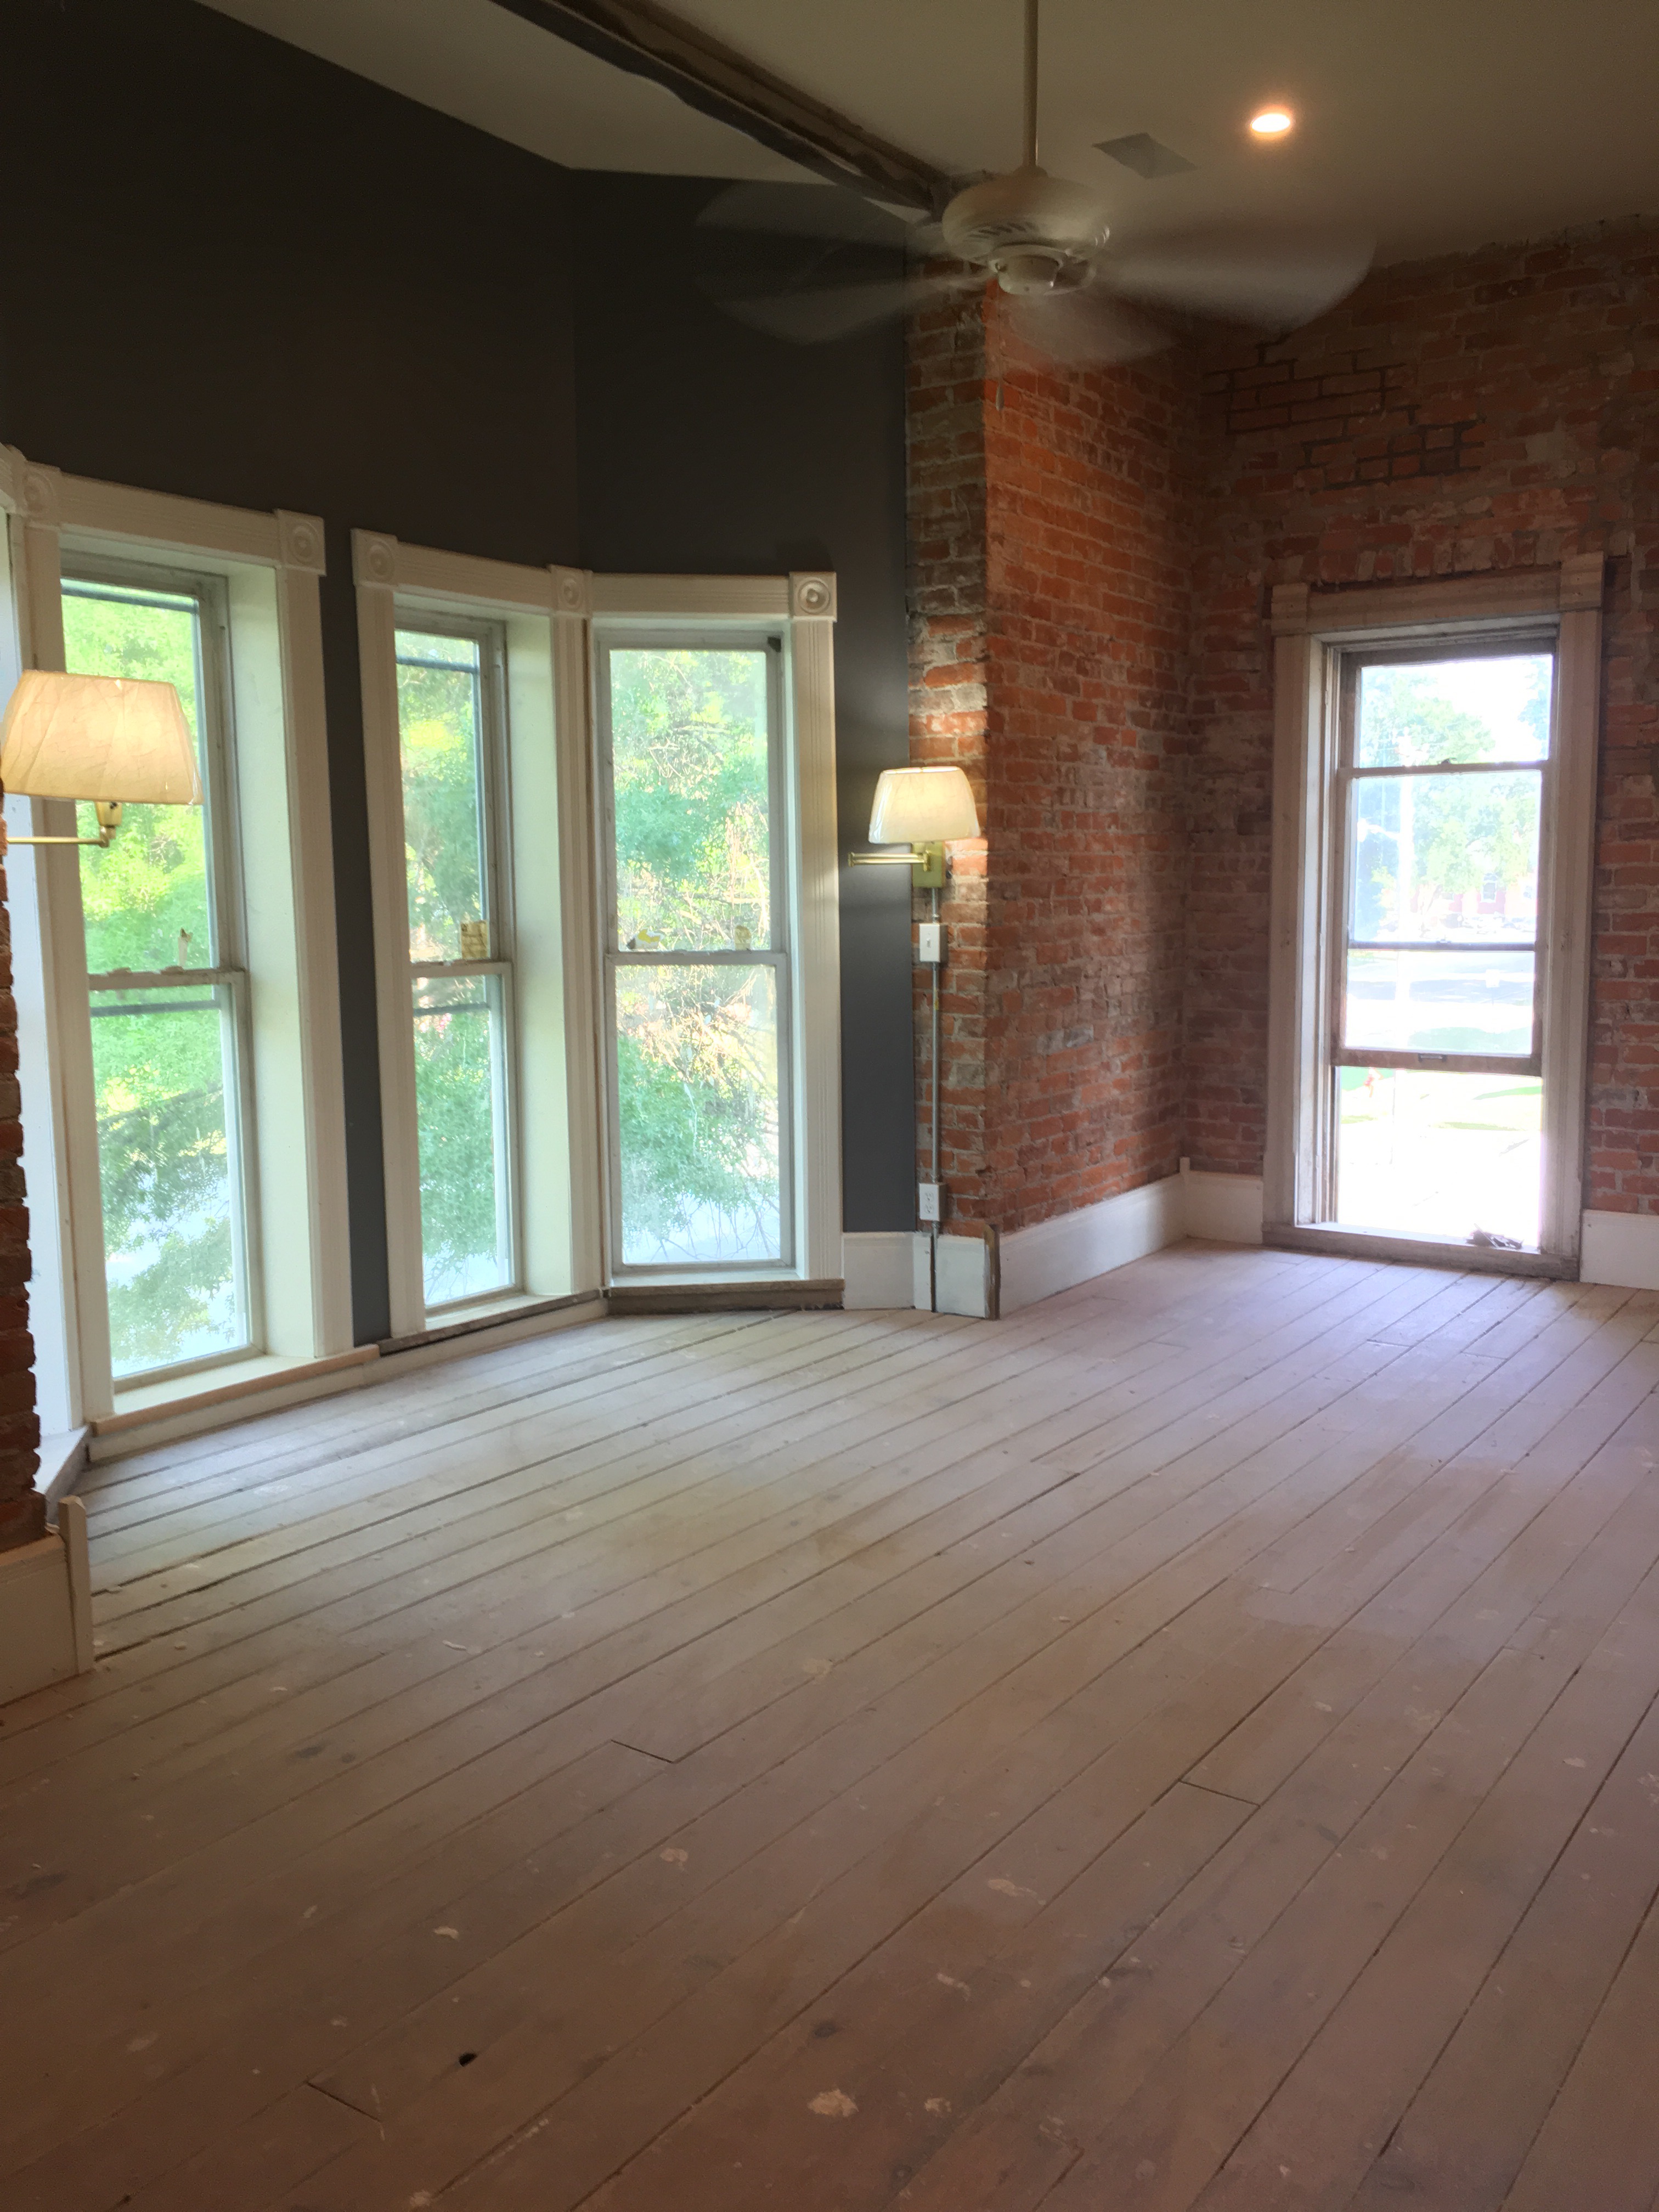
Southeast corner of the master bedroom. The head of our bed will be situated in the bay window, so this will be an outlet (bottom box), switch (middle box), and wall sconce (top box) for task lighting. There is one on the other side of the bay as well, so these will function as bedside lamps.  The brick here will stay exposed.

Kitchen door. These boxes will be outlets/light switches for the kitchen, and also service the exterior light and outlet (next to the back door). This brick will be painted, so the conduit/boxes will likely be painted to match.. 

Box for exterior light, next to side door (leading into the dining room).

In addition to inspection, we are hoping to get the insulation blown in the next week or two. We are still finishing up the work cleaning and prepping the brick walls and have our sheet rock crew ready to go.

Since we’re in our last few weeks of NOT having walls, I’m taking the opportunity to snap some last shots of our wall-less house. I kind of can’t wait until it doesn’t look like this anymore…but it is cool to get to see your house totally “naked.”

Electrical work in the downstairs entry.

Standing in the upstairs landing, looking through the master bathroom (foreground) and master closet (background).

Dining room ceiling. That green rod runs all the way across the house, north to south, and was probably put in about 1900-ish in an attempt to sort of hold the house together. It will stay, and will be exterior to the sheetrock…so will probably be painted to match the ceiling.

Standing on the staircase, looking down and into the living room. Our mason’s completed the brick work, including re-assembling the living room fireplace with original mantle and so-old-and-ugly-it’s-cool tile. Swoon.

And all the while, there’s been a lot of other not-so-small projects wrapping up…including finishing window and door installation and the roof over the downstairs bath/kitchen.

Kitchen windows. Alan did a beautiful job finishing them. He is already brainstorming how to trim out the space underneath them (currently just board) to match the rest of the house.

Downstairs bathroom window with Alan in action. These windows weren’t easy to finish, especially given the curved exterior. I’m telling you…this guy’s an artist. I told him I was going to name this window after him.

Kitchen windows, interior view.

Roofs over the kitchen and south bay window…complete!

Dining room door. Still needs trim & hardware…but fits like a glove.

Gratuitous pic of Bobby and Charlie in their bedroom. Just because they’re cute. And I don’t really know how to end this post. Other than to say…

Onward.

One less hole in the house


It’s been a couple of weeks since we posted…long enough that folks are literally stopping us on the street to ask why we haven’t posted any recent updates. But let me assure you that the lack of posts is more a reflection of general life busy-ness and less a reflection of what’s going on at the house. As a matter of fact, things have been clipping along over the last couple of weeks as we work toward “sealing up” the house to get ready for electrical work and sheet rock (you guys…we are almost ready for WALLS!).

So here’s a quick rundown of what’s been going on in the Off Center Revival…

Framing

reported about a month ago that framing was nearly done. But it’s basically done done now.

We made a modification to the boys’ closets. The original plan was for each bedroom to have one smallish walk-in closet. But, since the boys’ bedrooms (and closets) are adjacent to each other, we decided it might be more functional (and a lot more FUN!) to open up the space between the closets and have one bigger (6 x 10-ish) walk-in closet instead of two smaller ones. This also has the super-cool added benefit of serving as a not-so-secret passageway between the Max’s room and the little boys’ room.

Boys’ closets BEFORE. This photo is taken from Max’s room, looking through his closet into the little boys’ room. Bobby standing in the closet BEFORE the new design. The studs just to his right were for the wall to separate the closets.

Boys’ closet AFTER. This picture was taken from the little boys’ room looking through the closet into Max’s bedroom.  Look closely – no more studs between the closets!


They’ve also finished framing the space for the bar that will be custom-built under the stairs, in the downstairs entry. I super-excited about this!

Small space under the stairs framed in for a bar.

Processed with Snapseed.

A closer look at the under-stair bar space.


There’s also a lot of general framing on the walls and around windows to get ready for sheet rock.

Some of the brick will remain exposed and/or painted, but some – like the walls in the dining room – will be covered in drywall.


Doors

All 3 interior pocket doors are installed. And the wheels are in motion for us to have three actual, functioning exterior doors very soon. The back and side doors have been ordered. We found someone to refinish the front doors and just heard today that they are almost done! All the door hardware is in and we are researching some different smart-lock systems…but that’s a post for another day.

The back door, entering into the kitchen, has been installed!

Pocket door from the kitchen into the downstairs bath.

Pocket door #2, between the master bedroom and the master closet.

Third and final pocket door, between the master bedroom and the master bath.


Windows

Almost all the windows in the house start at or near the floor, which is really cool in most spaces. But don’t work very well in a kitchen or next to a tub.  In the kitchen, they’ve framed in the windows to begin about 4 feet off the ground, to make room for countertops and backsplash. This will require some creativity on the exterior. Since there was no way we could find brick to match, bricking in the “old” window space wasn’t an option. But we think we’ll just have some decorative trim designed, installed, and painted to match the other exterior trim. In the bathroom, the space will mostly be filled with glass block.

New window framing in the kitchen. You can see the large rectangle where the new window will go (windows are on order!), and the smaller space at the bottom that will need to be filled in.


Other stuff

There was some space around the upstairs bay window (in the master bedroom) that was framed in with no exterior sheathing. They’ve fixed that, so that’s one less hole in the house, and the trim is ready to go back on. They’ve also pulled off the roof over the back “bump-out” (kitchen and bathroom) and are ready to re-roof it as soon as the materials come in.

New sheathing around the master bedroom bay window.

Old roof

Ready for a new roof!

So what’s next?

  1. Install the front doors, side door, and windows.
  2. Putting the new roof on the back of the house.
  3. Electrician
  4. Drywall
  5. Repair floors
  6. Paint
  7. Cabinets
  8. Tile
  9. Fixtures
  10. Trim

MOVING DAY!

I still think we’re about 5 or 6 months out, but Joe thinks we’re 3 or 4.  No matter which way you slice it, there’s a small – but very real – light at the end of the tunnel.