As I mentioned in my previous post, over the last week or so I’ve been getting some panoramic shots of our naked, pre-sheetrock rooms. We’re still on track for sheetrock to start on Monday. And, despite a bit of a fear of jinxing myself, I have decided present to you our last set of “before” pics…because once we have walls, everything else goes in the “after” category. Right?
So here’s a little tour through the house as it is this week, with a little preview of our design vision for each room. I should mention that choosing colors and finishes had me completely paralyzed, so I want to give a huge shout out to our designer, Erin McKenna. Four short meetings with her (3 at the house, 1 at the tile showroom) got me completely un-paralyzed and focused. She did an incredible job of helping us select design elements that matched our style and our budget.
Remember – panoramic view totally screws up proportions…so rooms may be larger or smaller than they appear…
The important one(s): the master bedroom and bathroom
 Standing on the west wall, looking toward the east bay window. This big, old mantle is just sitting in the middle of the room right now. It isn’t original to the house and I’m not sure where it came from. But it will have to go…
 Standing in the east bay window, looking toward the (new) west wall. The door on the right leads to the master bathroom, which is about 6 x 12. The door on the left leads to our walk-in closet, which is about 6×8. There is a south-facing window to the left, which we would love to eventually replace with a door and a small balcony. To the right is the doorway leading to the upstairs landing.
 Exposed brick on the east wall of the master bedroom. The bottom color will be on the adjacent sheetrock walls.
The master bedroom walls will be a combination of exposed brick and sheetrock painted Whale Gray (the bottom, darkest color on this paint chip in the pic above). We’ve already purchased our bedding – it is the stonewashed belgian linen duvet from RH in dune (in the center of the design board below). The head of the bed will be in the bay window, with a small brushed brass swing-arm sconce mounted on either side of the bed.
 Design elements for master bedroom & bathroom
In the master bath (which I couldn’t really get a good picture of – it’s about 6 x 12, so long and skinny), the walls will also be gray. But we are planning to go with a light gray, probably a shade or two lighter on the chip than the Whale Gray. We’ll have a 72-inch double vanity, painted white dove with two mirrored medicine cabinets (one above each sink) and 3 tube sconces (one on either side of the mirrors and one in between them). I prefer brushed bronze fixtures in here, but Joe wins this one with his preference for chrome. The floor will be 12 x 24 marble tiles in “candid heather” (the left-most rectangular tile above). The shower floor will be a mix of the 3 marble hex tiles in the pic above – they are all the same color but have different finishes (polished, scraped, and sandblasted). The shower walls will be a large 4 x 10 white beveled subway tile.
The work zone: the upstairs landing
 Standing in the doorway of the master bedroom, looking north. This will primarily serve as an office/work space for me and Joe and the boys (in that order).
 Light fixture and paint color for the upstairs landing.
The plaster walls will be painted Revere Pewter and the brick wall will remain exposed. We have a really fun, funky light fixture picked out here. I think we’ll probably use an industrial-style table or two to serve as desks, with probably at least one adjustable or counter-height table as a standing desk. I might even get crazy and do a treadmill desk. We’ll also have our bookshelf and probably some comfy chairs, chaises, or beanbags. This space is really kind of huge and has great natural light. It’s honestly one of my favorite spaces in the house, but also one that may sort of come together after we live there a bit.
The one that can’t show dirt: the boys’ bathroom
 Standing in the boys’ bathroom doorway, looking in.
Immediately to the right will be a wall-mount vanity with a double-trough sink (we went with this IKEA model), with the toilet on the other side (next to the brick wall). The large closet-like space is going to be the laundry closet with bifold doors. On the left edge of this pic is the stand-up shower.
 Design elements for the boys’ room. Note the black on gray on gray on gray color scheme… Our designer had one directive on this room – it needs to hide dirt at ALL costs.
The boys’ bathroom floor will be these white and black patterned hex tiles with dark gray grout. The brick wall will be painted White Dove (to give it a subway-tile look) and the rest will be Galveston Gray. The tube sconce will be mounted horizontally over the mirror.
The least of our concerns: the boys’ bedrooms
 Standing in the doorway of Max’s room, looking in.
We’ll leave the brick wall exposed in Max’s room and paint the others “Clay Beige.” Max will have a simple ceiling fan light and wants to do his room in a sports/baseball/Royals theme (shocking!). We’ll need to get new bedroom furniture for him, and we’ll probably do a bit loft bed from IKEA, with a desk underneath. The doorway on the left edge of the picture leads to a large shared closet, which connects to his brothers’ room. This will either be a really cool secret passage or an annoying way for his little brothers to spy on him…or both!
 The little boys’ room, standing in the doorway facing south.
Some of the brick is really rough here, so it will likely be mostly painted (Clay Beige, like in Max’s room). They only have two sheetrock walls – one pretty big and one pretty small. The small one will probably be painted with chalkboard paint. They want a Star Wars room and are obsessed with a fathead they saw of Han Solo in carbonite and this Wampa Rug. So we’ll probably buy those and call it a day. Whatever.
 Downstairs bedroom/playroom, facing the northwest corner.
 Downstairs bedroom/playroom, facing the southwest corner.
The downstairs bedroom will be a playroom for now…but we are imagining this as a little more grown-up space than our boys’ current playroom. We will mount a TV to the wall and have their movies and gaming system in there, and will also store board games and legos in this space. The “little boy” toys will probably be stored in the little boys’ room. We hope this becomes a space where everyone can kind of hang out and have fun. This room will probably be Revere Pewter or Clay Beige…
 The boys’ bedroom & playroom design elements basically consist of a paint color for the wall (Clay Beige), and one for the trim (White Dove).
The big one: the living/dining/entry
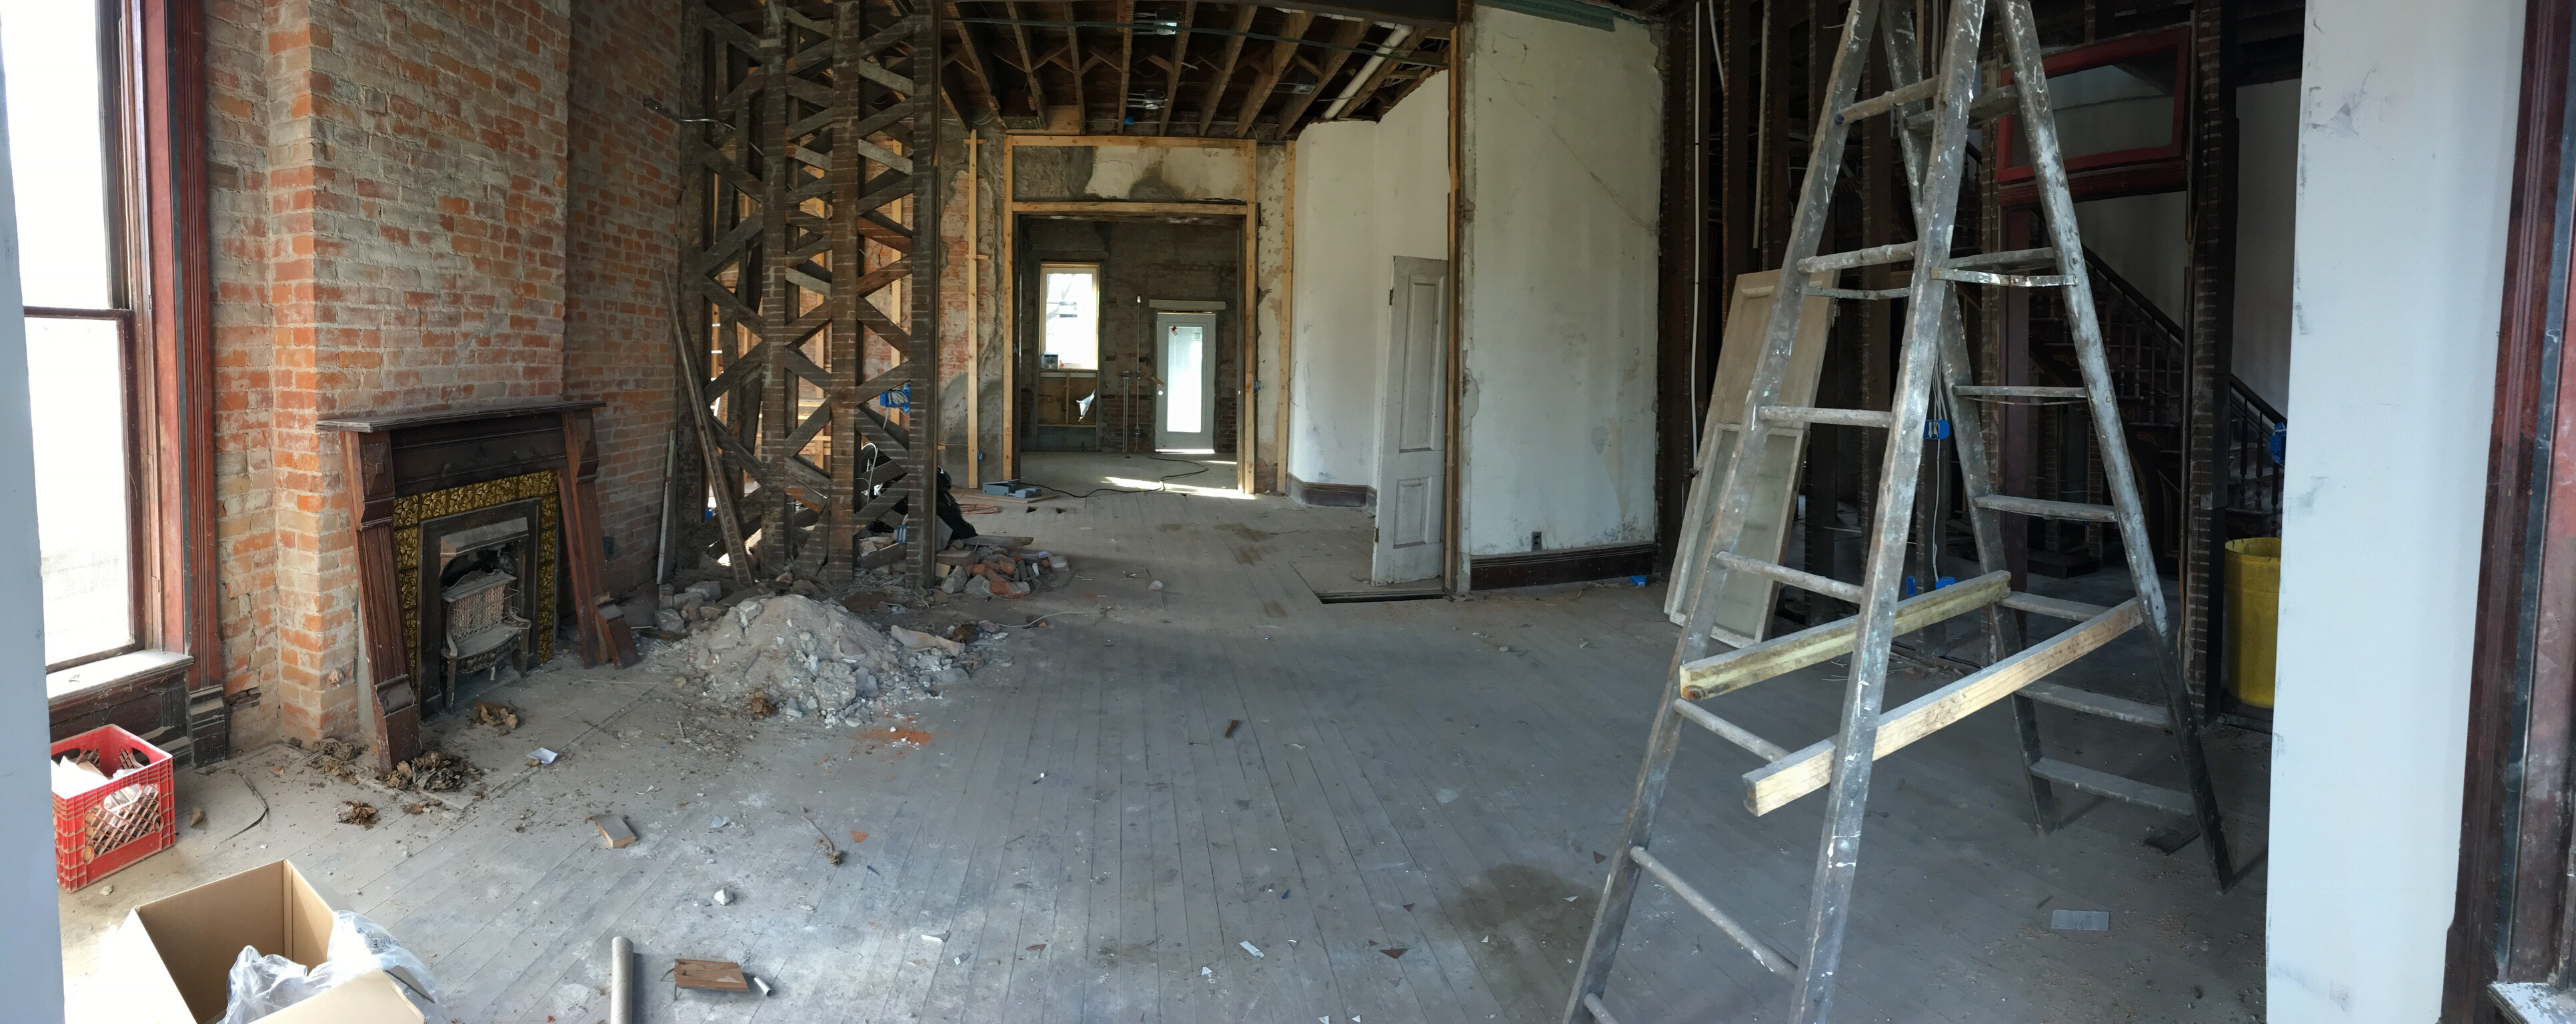
 Standing in the living room bay window, looking west through the living room and dining room, into the kitchen.
 Living room, facing south.
 Design elements for the living/dining/entry
The brick wall will stay exposed, and the rest will be painted Revere Pewter. The original mustard-brown tiles will stay on the mantle, and there are also some original large marble tiles that lay in front of it. We’ll put a large mirror over the fireplace and the TV to the right. We haven’t purchased living room furniture yet, but I’m eyeing a light brown leather sectional, emerald green chair, and brown & white cowhide rug. We’re also planning to have an industrial-style table on the north wall to serve as a little desk/work area, with the big 1950s map we found in the house hanging over it.
 Living room, facing the northeast corner of the living room. We’ll put some sort of little seating in the bay window…but not sure what yet.
 Dining room.
All the dining room walls with be sheetrock or plaster, and all will be painted Revere Pewter. Our dining table will be fully extended (to seat 8-10) and situated toward the bay window half of the room, leaving the doorway into the kitchen mostly open. We have two large crystal chandeliers to hang over the dining table. We’ll get some kind of big sideboard to go along the west wall…I’d love to find something vintage or restored. I plan to display the old wallpaper remnants from the house in brass frames over the sideboard. On the curved walls (on the right), we want to find a cool piece of art (we have a directional can light there) and maybe a fun chair…
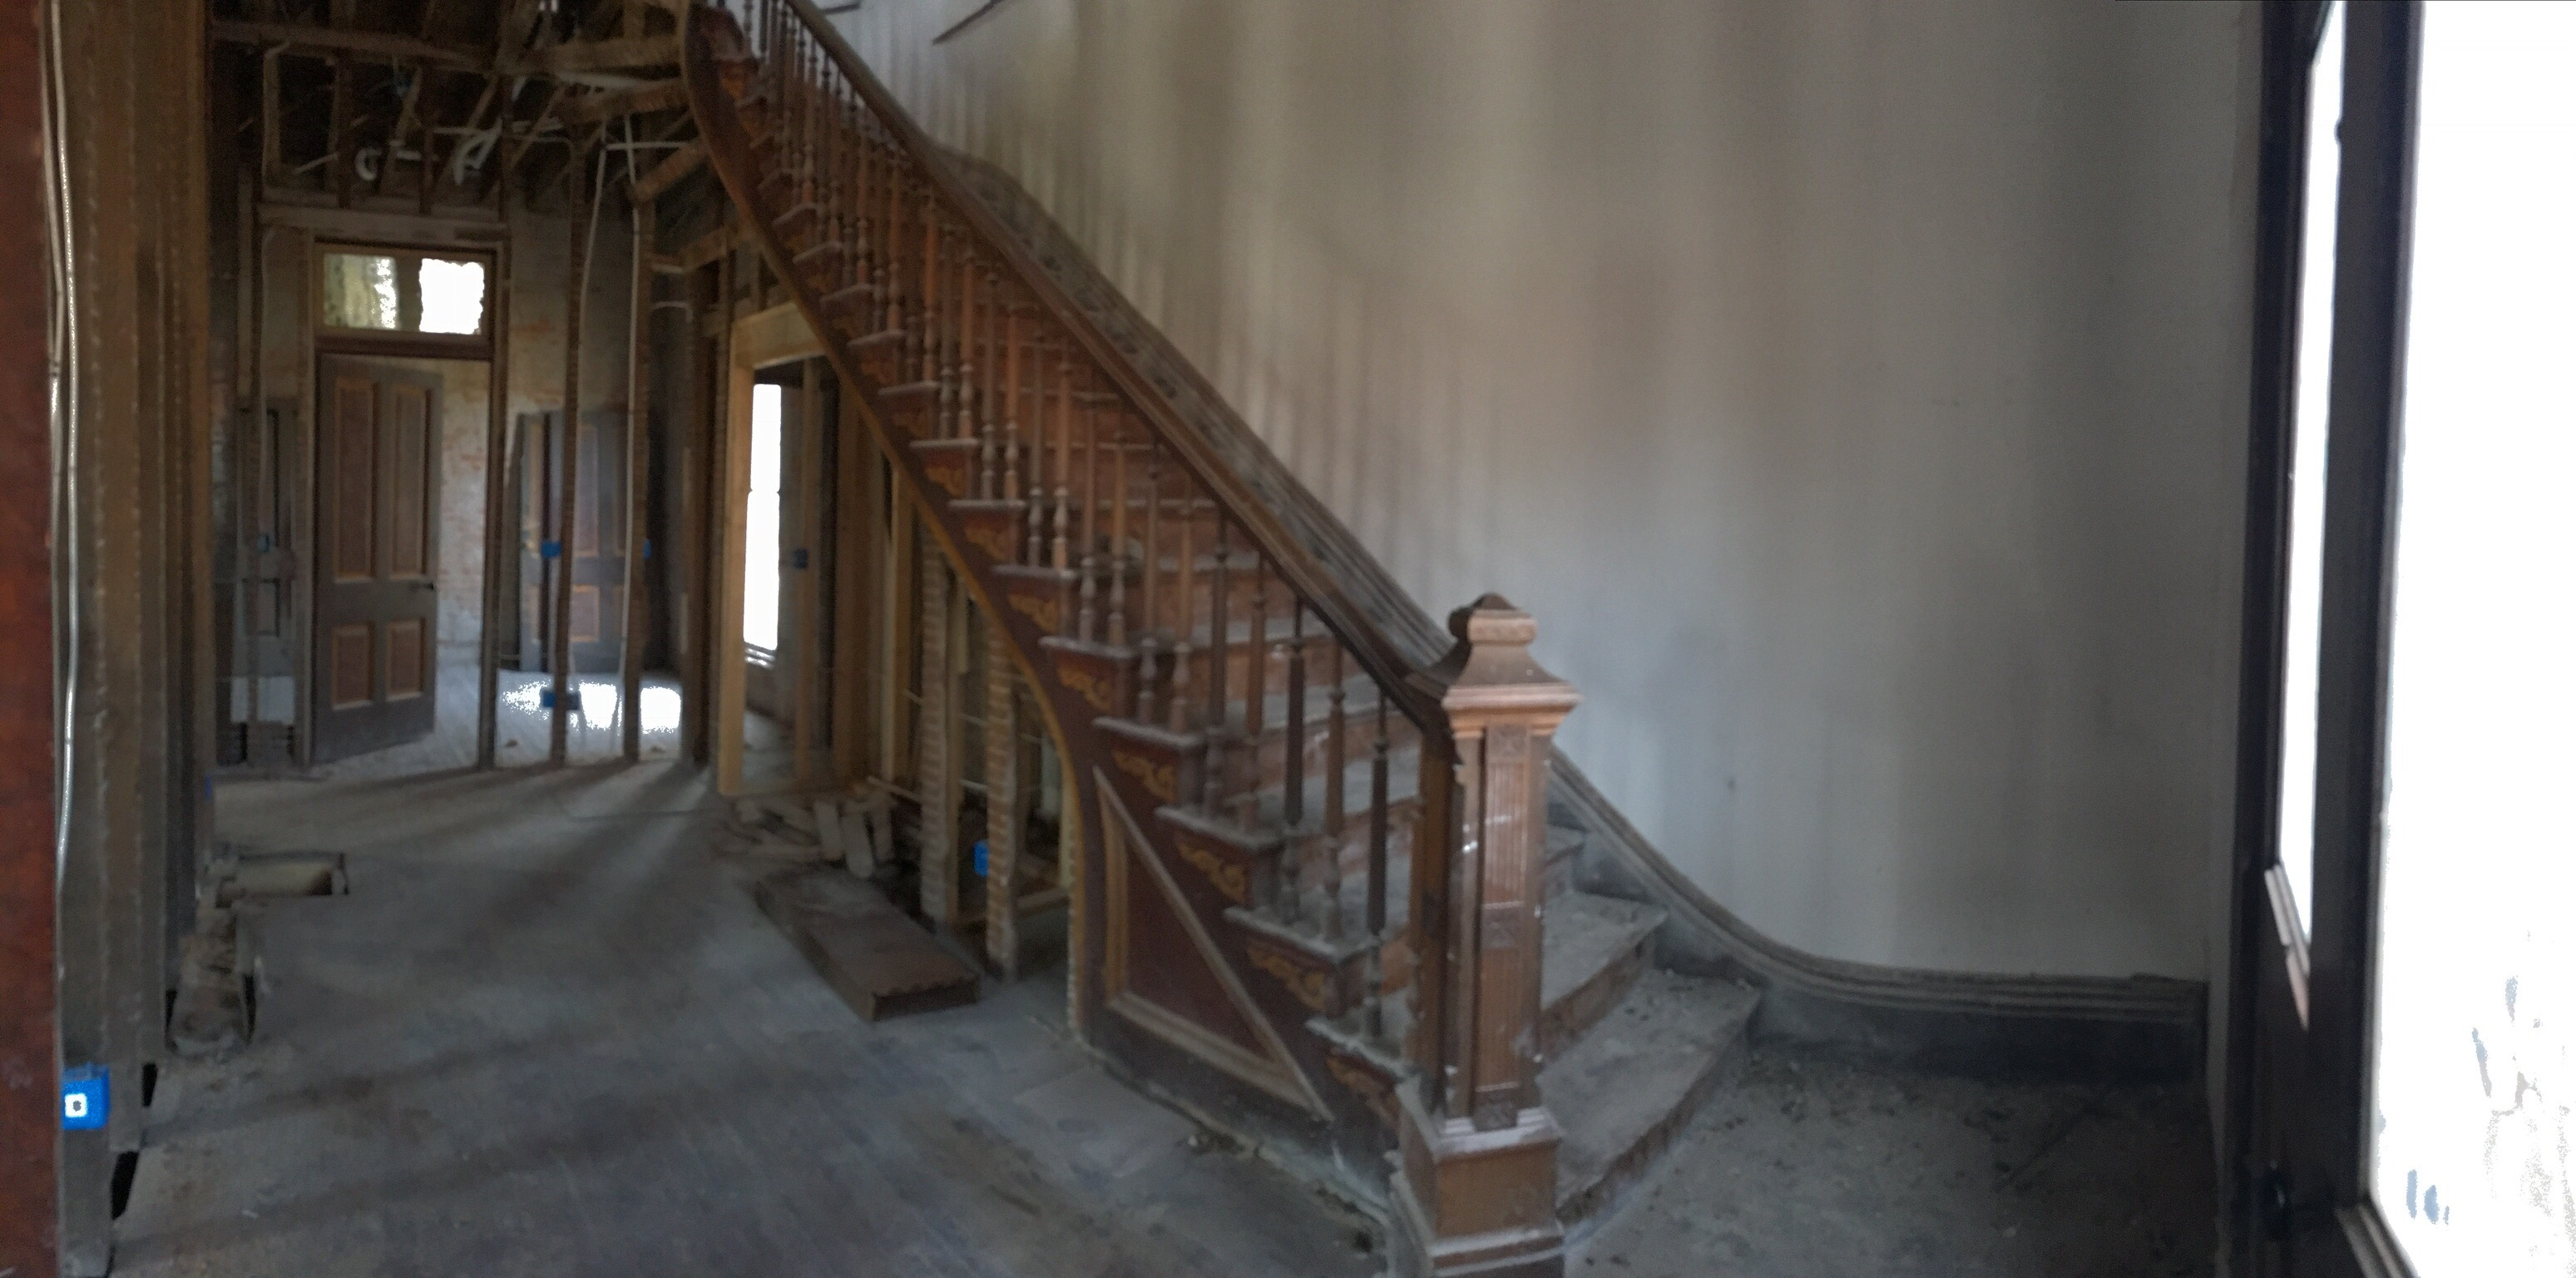 Front entry.
The entry will also be Revere Pewter. We have a large French-style chandelier to hang and there will be a built-in bar under the stairs (cabinetry to match the stairs with a quartz countertop in Frosted Wind, that looks like marble).
The really, really tricky one: the kitchen
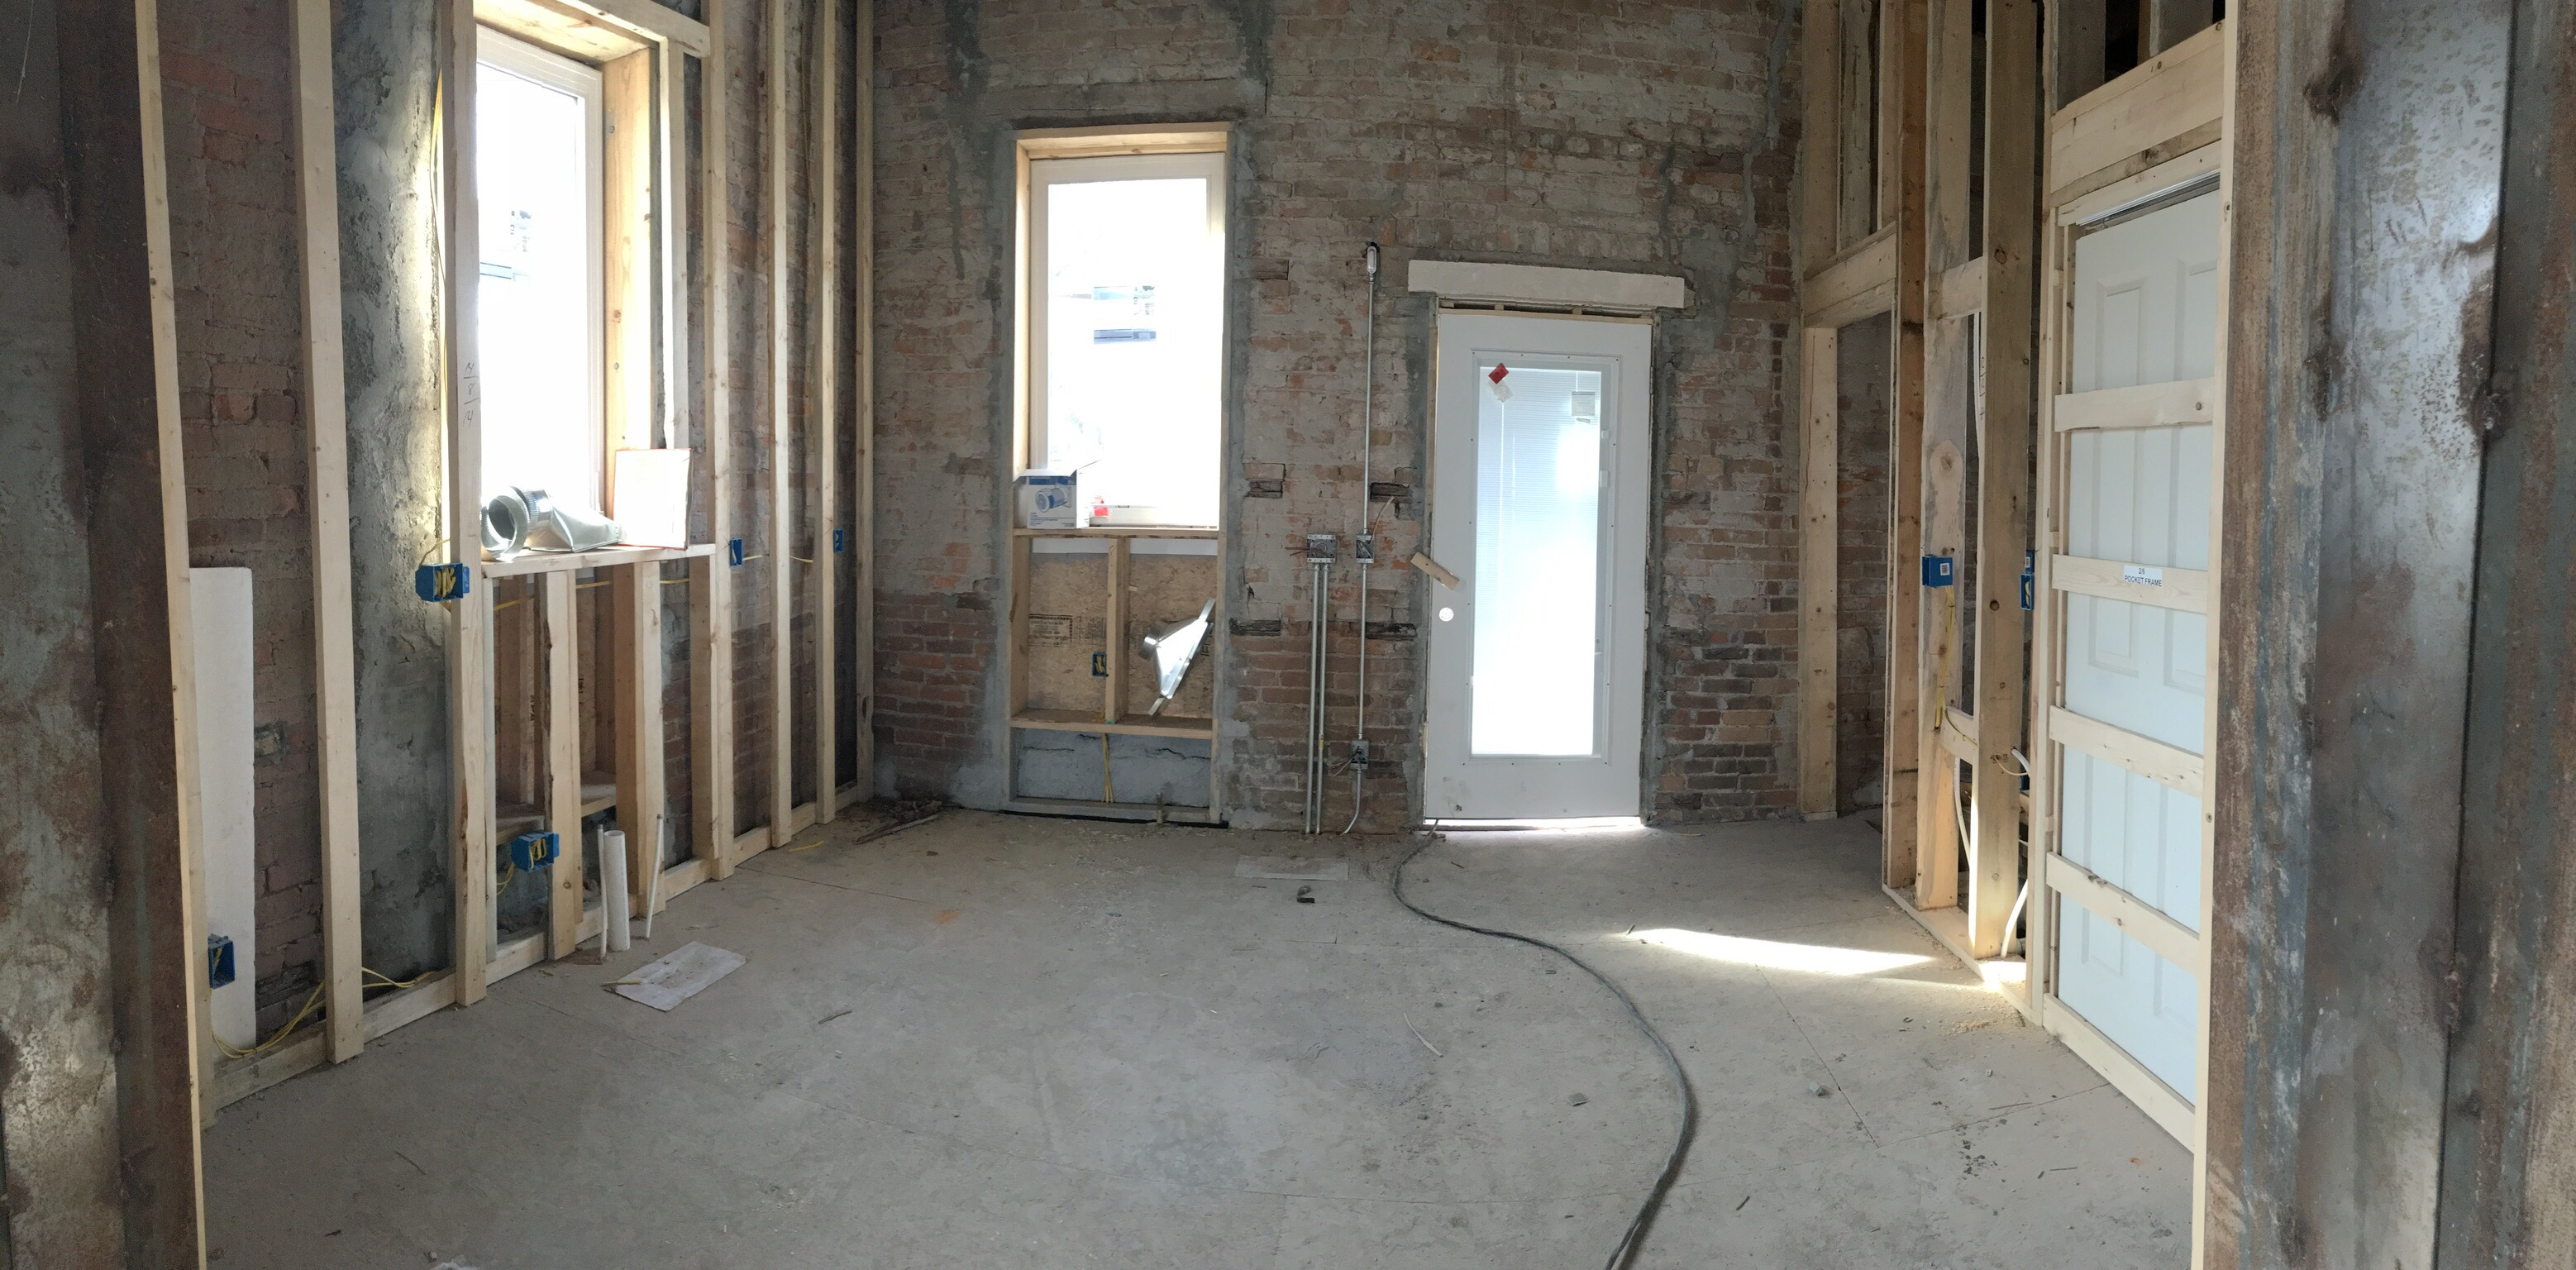 Standing in the dining room door, facing west.
The kitchen is the room that keeps me up at night. This one has been a challenge. It’s not very big (about 12 x 12) and has so many weird windows and doors that it is hard to configure. Plus, the back door will be a primary entrance for the family and this will be a main thoroughfare through the house. We’ve settled on an L-shape design (counters along the west and south walls) with upper cabinets on the south wall and no uppers on the west wall. There will be a wall of pantry cabinets on the north wall, between the mudroom and bathroom doors. We are planning on a small island, but it’s going to be tight so not sure if we’ll have an overhang for bar stools or if it will be more of a prep & perch area (rather than a seating area).
 Kitchen design elements
We are going with large charcoal gray tiles on the kitchen floor – they aren’t slate, but have a very slate-like look. The cabinets will be painted Coventry Gray and the walls will be painted White Dove. We’ll have a white apron-front farmhouse sink and brushed bronze fixtures (our faucet is from Delta). Our countertops will be quartz with a marble look. I really love our island light, the Bistro Globe chandelier – it’s probably my second-favorite light…after the explosion chandelier upstairs.
The small but fierce one: the downstairs bath
 Downstairs bath. Standing in the doorway looking in.
The downstairs bath is 5 x 8, so just *barely* big enough to be a full bath. The tub/shower is to the far left in this picture. The room had a large window that started at the floor, so we had to frame that in and glass block it for the shower. There will be a pedestal sink on the right with an oval mirror hanging over it, and the toilet in the middle.
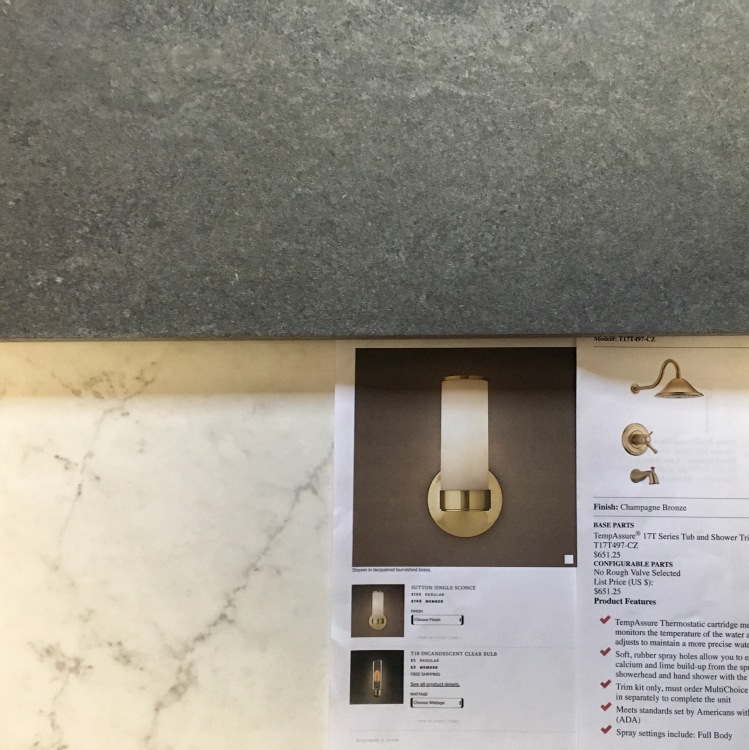 Design elements for the downstairs bath. This room is tiny, but it is probably the one for which I have the clearest vision for the final design.
The downstairs bathroom floor will be the same slate-like floor as is in the kitchen. We’re also going with brushed bronze fixtures in this room with a single sconce hanging next to the mirror, marble-look tile on the shower wall, and Delta Cassidy shower fixtures.
So there you have it…one last “before” tour of the house and the design vision for each room.
We’ll regroup in a few months and see what came true.
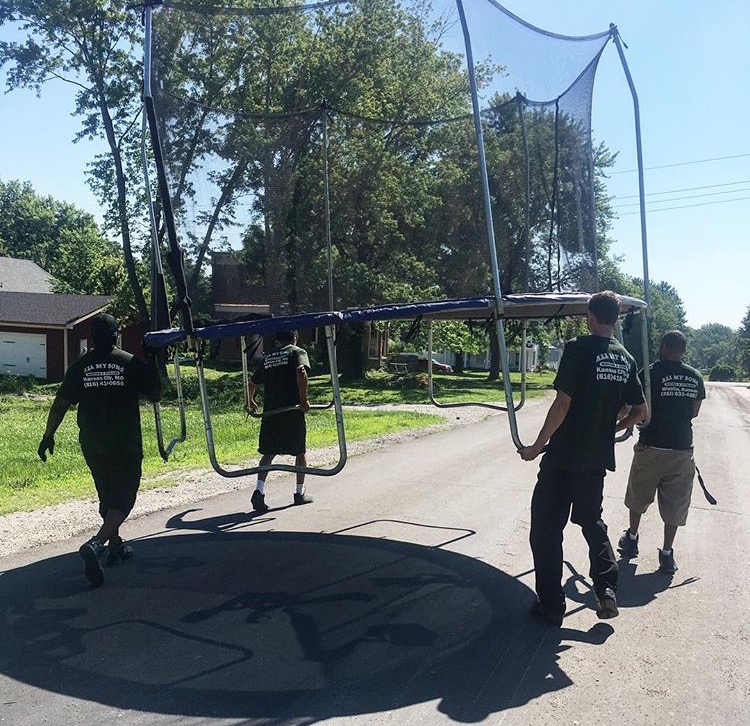 All My Sons did a great job moving us…and agreed that it would be easier to just carry the trampoline a few blocks than to try to disassemble, move, and reassemble it.
 The beach is our happy place.


